时间:2024-01-18|浏览:331
在本文中了解如何登录 DOP 测试网上并完成任务。 完成所有步骤后,您将有资格在 2024 年初官方代币发布后获得 DOP 代币奖励。 请关注我们,了解确切的发布日期。

在你开始之前:
为了获得最佳体验,请在桌面上使用最新版本的 Google Chrome,在移动设备上我建议使用 kiwi 浏览器。
目前仅支持Metamask钱包使用。
首先,访问 DOP 的网站或复制并粘贴此链接到您的浏览器https://doptest.dop.org/id=4VtgT05 单击位于主页顶部的 Testnet 按钮。
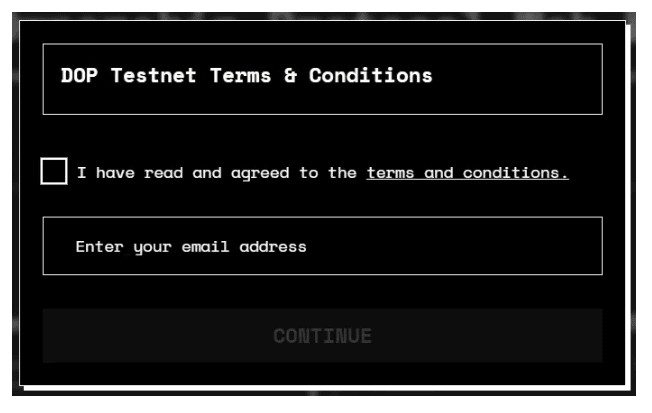
2. 勾选该框以确认您已阅读并接受条款。 输入您的电子邮件,以提醒您在 2024 年初正式代币发布后返回并领取奖励。然后,单击继续。
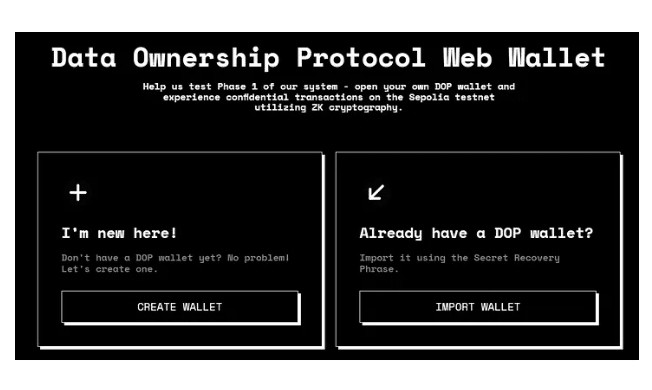
在接下来的屏幕上,如果您还没有 DOP 钱包,请选择“创建钱包”。 如果您已有钱包,请单击“导入钱包”,然后按照屏幕上的说明恢复您的钱包。
按照以下步骤创建一个新的 DOP 钱包。 这允许您在测试网上加密、发送/接收和解密加密资产:
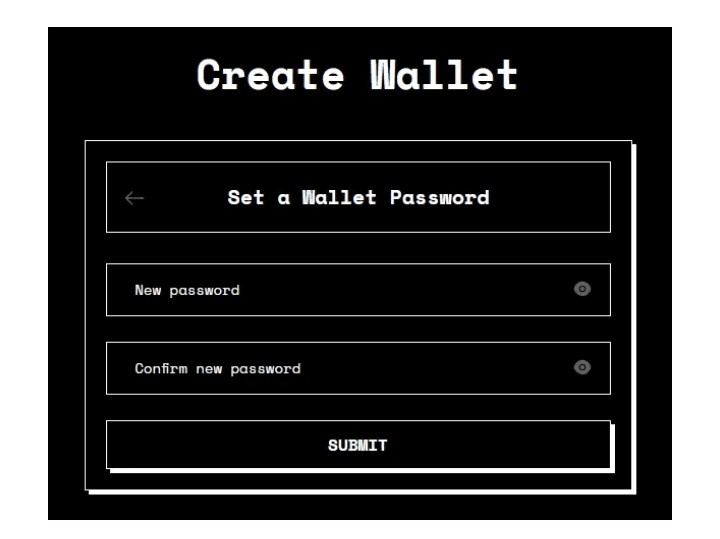
1. 在“创建钱包”屏幕上,设置新密码并在“确认新密码”字段中再次输入密码进行确认。
2. 完成后,单击“提交”。
3. 将出现您的秘密恢复短语。 单击底部的“复制短语”进行复制并安全存储。 保持其可访问性,因为您需要在下一个屏幕上以正确的顺序输入单词。
4. 选择“验证”。
5. 在“验证您的秘密短语”屏幕上,按正确的顺序选择秘密短语的单词。 然后,单击“确定,我完成了”。
6. 单击“恭喜!”上的“继续”。 屏幕。
7. 显示您的密钥。 单击“复制”图标进行复制并将其保存在安全位置。

8. 单击“完成”。
9. 出现“解锁您的钱包”屏幕。 在密码字段中输入您的密码,然后单击底部的“解锁”以访问您的 DOP 钱包。
10. 在欢迎屏幕上单击“开始”。
11. 在“连接钱包”屏幕上,选择 Metamask 以链接您的外部钱包。 确认外部钱包中的连接。
12. DOP 测试仪表板现在可见。 继续阅读仪表板概述以及您可以使用它执行的各种操作和事务。
测试仪表板概述:
这是测试环境的主屏幕。 在顶部,跟踪您完成测试任务的步骤的进度。
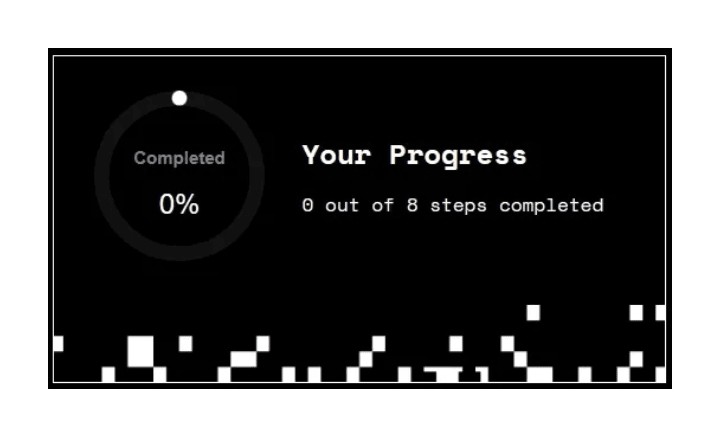
To qualify for DOP rewards, you must finish a total of 8 steps. These steps are listed beneath the progress section. As you complete each step, its status will change to "Completed," unlocking the next step for you to proceed.
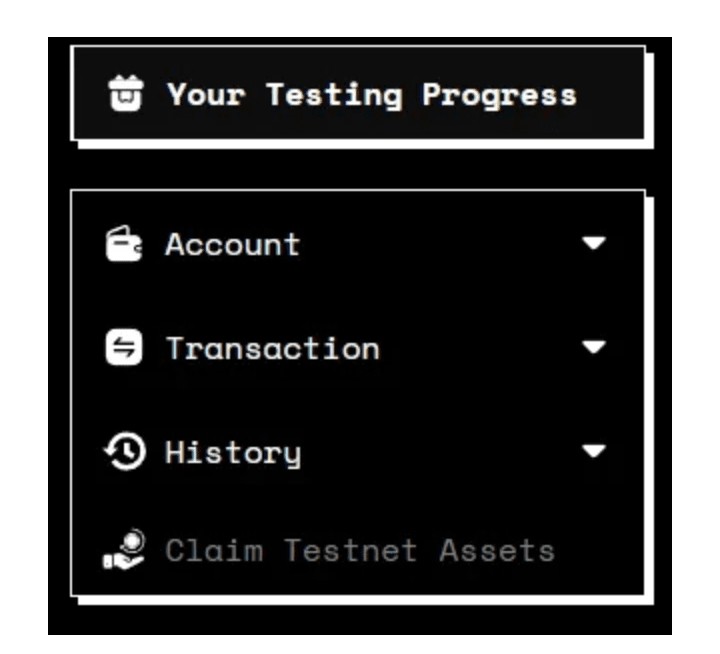
The menu bar on the upper left side contains all the functions accessible on the Testnet. Click any menu item to expand and see the available functions. To return to the testing dashboard at any time, simply click on "Your Testing Progress."
Task Completion:
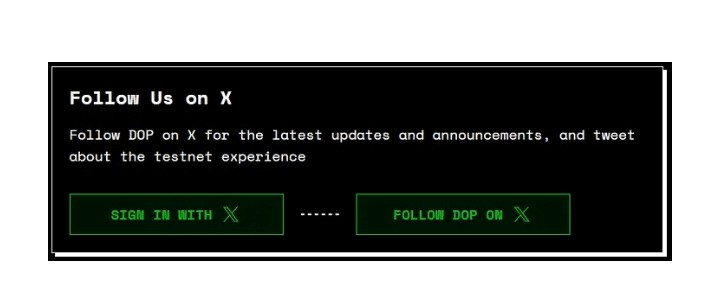
Step 1 — Follow us on X (formerly Twitter)
Begin by following DOP on X.
1. Select "Sign in with X."
2. Once the button turns green, click "Follow DOP on X."
2. In the popup that appears, select the checkbox to confirm you have followed on X, then click Done.
To claim testnet tokens in Steps 2 to 4, just click the Claim button:
- Step 2: Get 0.05 SepoliaETH tokens.
- Step 3: Receive 1000 Testnet DOP tokens.
- Step 4: Acquire Testnet versions of 10 crypto assets, each with 10,000 tokens for testing purposes. Add the token contracts to Metamask by clicking on the Metamask fox icon in Steps 3 and 4.
You can also manually add individual contracts by selecting the token you want from the dropdown list and clicking Copy.
When you have completed these three steps, your screen should look similar to this:
Now, let's dive into an exciting step – encrypting assets with DOP:
1. Click "Get Started" to initiate the encryption process.
2. On the Encrypt screen, your DOP wallet address is already filled in. If you have multiple DOP accounts, choose the desired one from the dropdown.
3. Click in the "Select Token" field to see available assets.
4. Choose the currency you want to encrypt or use the search bar for a quick selection.
5. Specify the amount in the "Amount" field.
6. Click "Encrypt" at the bottom to complete the process.
1. Confirm the transaction on the Transaction Summary screen.
2. Verify and confirm the transaction in Metamask.
3. Upon successful completion, a notification will confirm the successful encryption of assets.
4. To view the transaction on the Sepolia blockchain, click "View in Explorer."
5. Close the process by clicking "Close." Confirm the successful task completion in the popup by clicking "OKAY."
Your chosen assets from Step 5 are now encrypted. To check these, click on "Encrypted Tokens" under Account in the upper left menu.
Moving on to Step 6 — Sending Assets:
1. Click "Get Started" in the Step 6 — Send Assets tile.
2. Use the dropdown or enter a DOP wallet address manually in the DOP Account field.
3. Choose the encrypted token you want to send.
4. Enter the desired amount in the "Amount" field.
Sending encrypted assets in Step 6:
5. Click "Send" to transfer the encrypted assets.
6. Confirm the transaction in the Transaction Summary pane and in Metamask.
7. Wait for the transaction to complete, usually within a few seconds. Dismiss the displayed popups to proceed.
Now, onto Step 7 — Decrypt Assets:
1. Click "Get Started" under Decrypt Assets in your testing dashboard.
2. The External Account field is auto-filled with your connected wallet address.
3. Choose the encrypted asset you want to decrypt from the list.
4. Specify the amount and enter your Wallet Password.
5. Click "Decrypt."
6. Confirm the transaction in the Transaction Summary screen and in Metamask.
7. Upon completion, a notification confirms the successful decryption. You can also view the transaction on Etherscan by clicking "View in Explorer."
8. The decrypted tokens are now visible on the blockchain. Click "Close" to finish.
Proceed to the Final Step.
Share your referral link with at least three friends, then click "Done." Check at the bottom of the Step 8 — Invite 3 Friends box to see if three of your invited friends have joined.
Congratulations! Once three friends join using your unique link, you'll qualify for your DOP reward after the official token launch in early 2024. Your progress at the top of the screen will show 100%.
Remember, for every additional person you refer (up to a maximum of 100) who completes all the testnet steps, you receive a 20% bonus. This means you can earn up to 2000% more in DOP token rewards!
In the top-right of your dashboard, under Invite & Earn, track how many people joined through your link (starting from the 4th person) and completed the testnet. Also, see the percentage of bonus rewards you're entitled to.
Feel free to use the navigation bar on the upper left to encrypt, send, and decrypt tokens again, although these actions won't contribute to additional rewards.
For feedback, reach us at support@dop.org. Thanks for helping us test and enhance DOP!
Remember, this is the testnet, showcasing the basic features of Phase 1. The official release will introduce numerous additional features and options. Stay tuned for updates!
热点:DOP

用戶喜愛的交易所

已有账号登陆后会弹出下载


